
We need a Moodle Role that enables all the permissions needed by the edX Moodle Integration.
You can either create a new system role or assign existing role(s) to the user. This will focus on creating one that is limited to the permissions we need.
- Navigate to "Site Administration > Users > Define roles"
- Click on the “Add a new role” button near the bottom
- There’s no real need to choose a role as this will just assign all of the permissions needed, so click the “Continue” button.
- Check the boxes "System", "User" and "Category" next to the “Context types where this role may be assigned” section
- Scroll to the bottom and search for the permissions. Check the box next to each of the permissions. The permissions needed are as follows:
-
-
-
- moodle/category:manage
- moodle/category:viewhiddencategories
- moodle/course:create
- moodle/course:changecategory
- moodle/course:changefullname
- moodle/course:changeidnumber
- moodle/course:changeshortname
- moodle/course:changesummary
- moodle/course:delete
- moodle/course:visibility
- moodle/course:update
- moodle/course:tag
- webservice/rest:use
- moodle/webservice:createtoken
- moodle/user:update
- moodle/course:enrolconfig
- moodle/course:manageactivities
- moodle/course:useremail
- moodle/course:view
- moodle/course:viewhiddencourses
- moodle/course:viewparticipants
- moodle/course:visibility
- moodle/grade:edit
- moodle/grade:viewall
- moodle/user:viewdetails
- moodle/user:viewhiddendetails
- mod/assign:grade
- mod/assign:view
- moodle/site:accessallgroups
-
-
-
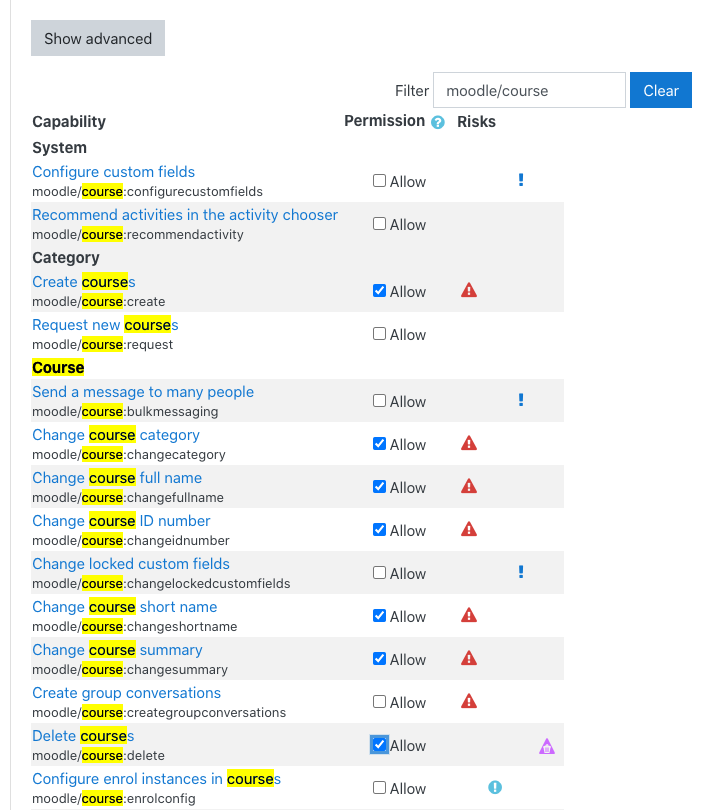
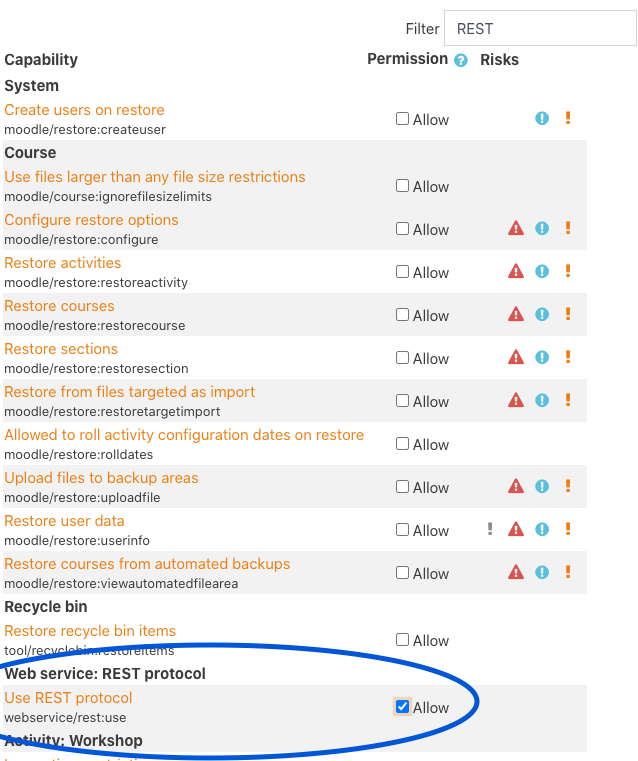
6. Once finished, click Add o(Save Changes) at the very bottom. You’ll then see the list of permissions for this role so double check all permissions have been assigned.
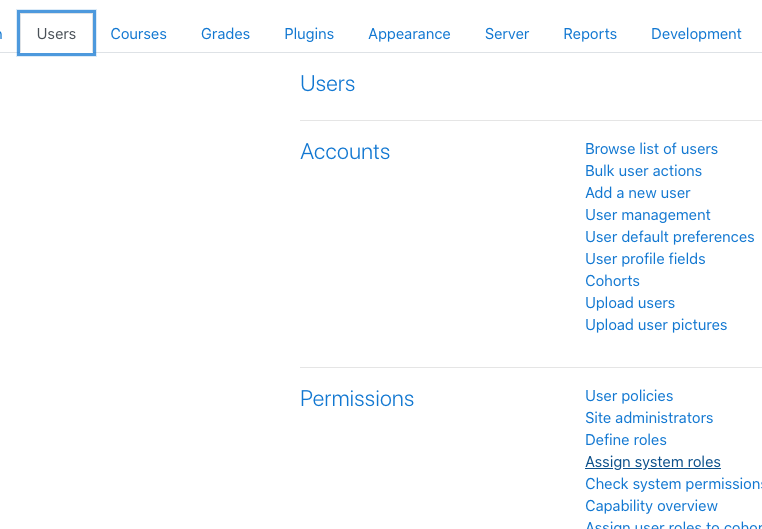
7. Next navigate to Site Administration > Users > Assign system roles
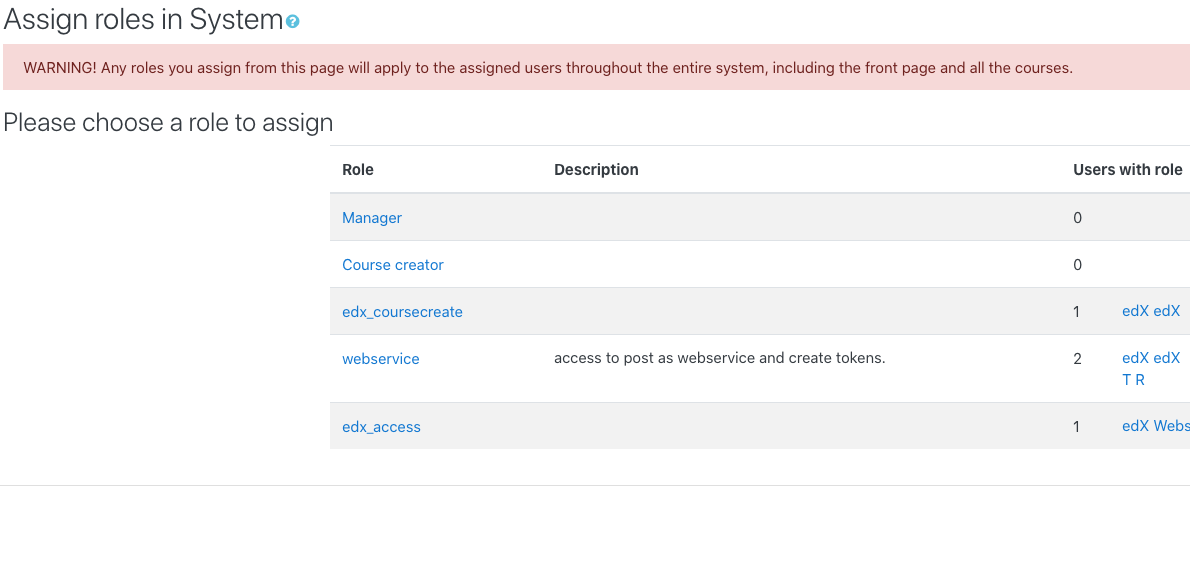
8. You should see your new system role on the next screen. Click on the name to assign users.
9. This will then take you to another user selection screen. Move the user you created for edx webservice usage over to this role by highlighting their username and click “Add”.
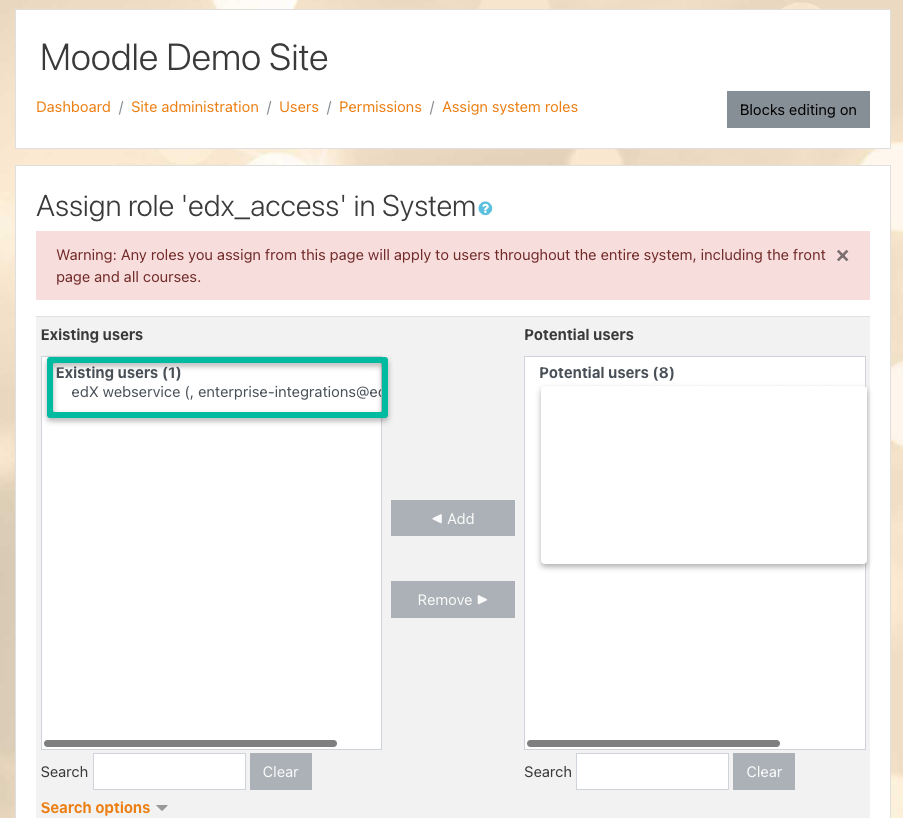
10. Changes are saved automatically, so after this you should be done configuring the appropriate permissions and role to the user.
Well done!